The following tutorial shows how a change in signal value is identified. It is based on the data base created in the preceding tutorial.
Create a new VBA project with New. Save the project by the name “Change signal value”.
Subsequently, create a class module in the VBA editor.
Enter the following code:
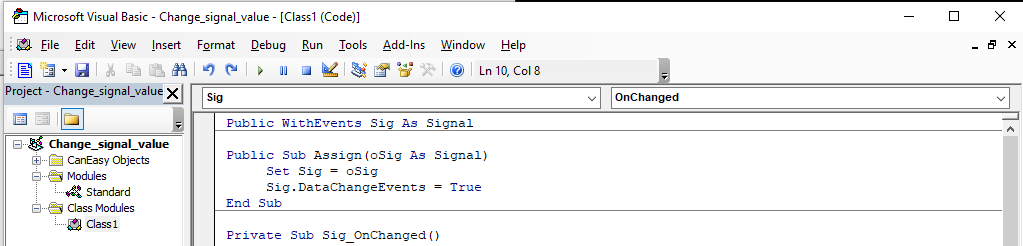
Public WithEvents Sig as Signal
Public Sub Assign (oSig as Signal) Set Sig = oSig Sig.DataChangeEvents = True End Sub |
Sig.DataChangeEvents = True signals to the COM interface that the event shall be activated.
Next, select Sig in the left selection list and OnChange on the right to create the body of the event handling routine.
Add the following code in the provided routine Sig_OnChanged:
Private Sub Sig_OnChanged Debug.Print "changed signal value" End Sub |

Now, enter the following code in the standard module:
Public Pedal as Class1
Sub setsignalvalue (oSig as signal, fValue as double) OSig.ValuePhys = fValue End Sub
Sub Testrun () Dim ECU as ControlUnit Set Pedal = New Class1
Set ECU = Database.buses ("CAN1"). ControlUnits ("ECU1") Pedal.Assign ECU. messages ("MSG1").Signals ("SIG1")
StartSimulation 'start simulation Set signal value Pedal.Sig, 30 'accelerate CanEasyApplication.Sleep 7000 'wait for 7 seconds Set signal value Pedal.Sig, 60 'accelerate still more StopSimulation 'end simulation End Sub
|
It is important to create an instance of the class Class1 with the key word New.
Subsequently press Ctrl-G to show the direct area and execute the function Testrun. The instructions in the event handling routine are executed and displayed in the direct area window (the message “Changed signal value” appears twice).